How to add filters to your Astro blog
Introduction
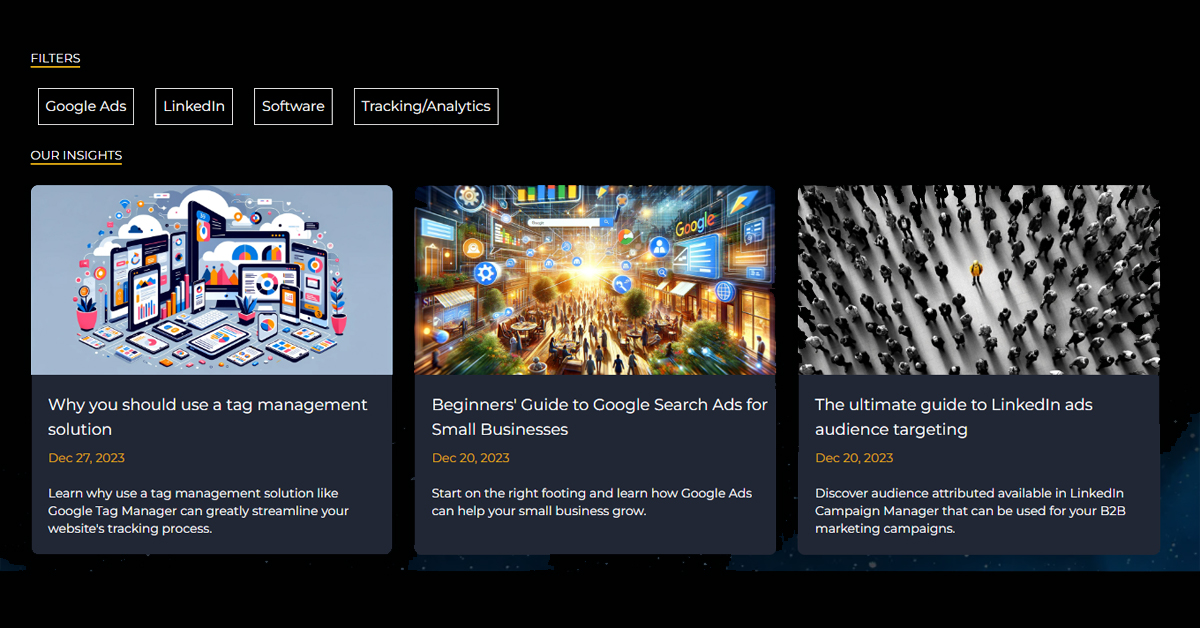
I’ve been working with the Astro web-framework for ~8 months and recently added new functionality to our site that allows for client side filtering of our insights section. This was a fun problem to solve and I wanted to share my approach for how I tackled this.
For those of you looking to implement this, please note we are using content collections with .mdx file types. We use the tag frontmatter as the basis for our filtering.
Step 1: Creating the filter buttons.
The first step was to create a component for our filter buttons. We gave this component an ID of blogFilter and passed the tag as a data attribute.
---
const {tag} = Astro.props
---
<button data-type={tag} class="text-primary bg-gray-200 p-2 mx-2" id="blogFilter">
    {tag}
</button>
Step 2: Get unique tags from our collection
In our index.astro file inside our insights collection folder, we then created an array with unique tags from all our insights.
These unique tags were used as another data attributed for the parent element holding our tag buttons.
The map function was used to loop through these unique tags and create a filter for each tag (form step 1).
---
const insightsPosts = await getCollection("insights", ({ data }) => {
  return data.draft !== true && new Date(data.date) < new Date();
});

const tags = insightsPosts.map((p) => p.data.tags).flat(); //Gets all tags from collection
const uniqueTags = [...new Set(tags)]; //Keeps only unique tags
---

<div class="flex flex-wrap gap-2 mb-2" id="tags" data-tags={uniqueTags}>
          {uniqueTags.map((tag) => <BlogFilter {tag} />)}
 </div>
Step 3: Add tags as classes to blog card components
I then edited our blog card component to include the tag as a class. You can get this data from the post frontmatter. Here’s a snippet of what ours looks like.
---
const {post} = Astro.props
const frontMatter = post.data
let tags = frontMatter.tags
tags = tags.join(" ")
---

<div class=`bg-primary rounded-lg ${tags}`>
    <a href={url}><img src={blogImage} alt="blog-hero"></img></a>
    <h3 class="pt-5 pl-5 text-lg">{title}</h3>
    <p class="text-accent pt-2 px-5 text-sm ">{date}</p>
    <p class = "px-5 py-5 text-sm">{description}</p>
</div>
Step 4: Client side Javascript
- We need to create a function that will hide blogs with tags that have not been selected.
- To do this, we get the
data-typeattribute for the button that was selected (this is the tag name we set in step 1). - We then get all of our tags from the parent element from the
data-tagattribute we set. - This is converted into an array, and the selected tag is removed from the array. This gives us a list of tags to hide.
- We loop through our array of tags to hide and select all elements with these tags (using the
getElementsByClassNamemethod). These then have their display property set tonone. - We then select all elements with our
selectedTagclass, loop through these and set display toblock - Once this function is defined, the final step is to add an event listener to our
blogFilterbuttons and call the function on a click event.
<script>
  function hideBlogs(evt) {
    let selectedTag = evt.currentTarget.getAttribute("data-type");
    let tagElement = document.getElementById("tags");
    let tags = tagElement.dataset.tags;
    tags = tags.split(",");
    tags.splice(tags.indexOf(selectedTag), 1);

    tags.forEach((t) => {
      const elementsToHide = document.getElementsByClassName(t);
      for (let i = 0; i < elementsToHide.length; i++) {
        elementsToHide[i].style.display = "none";
      }
    });

    let elementsToShow = document.getElementsByClassName(selectedTag);
    for (let i = 0; i < elementsToShow.length; i++) {
      elementsToShow[i].style.display = "block";
    }
  }

  // Event listener for the button click
  const input = document.querySelectorAll("#blogFilter");
  input.forEach((e) => {
    e.addEventListener("click", hideBlogs);
  });
</script>


